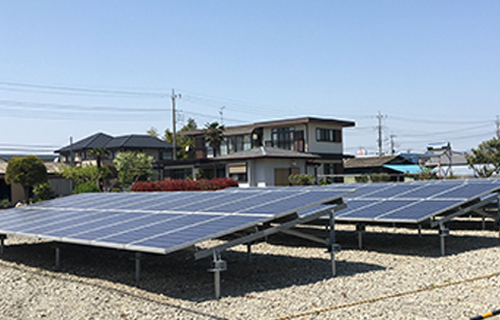
Ground Mount Solar System: A Guide to Installing Solar Panels on the Ground
Solar panels are a great way to generate clean and renewable energy for your home or business.
However, not everyone has a suitable roof for installing solar panels.
If you have a large land area, low shading, or prefer not to drill holes in your roof,
you may want to consider installing solar panels on the ground.


Ground mount solar system is a term that refers to installing solar panels on the ground, using either a fixed or a tracking mounting system.
A fixed mounting system holds the solar panels at a fixed angle and orientation, usually facing south in the northern hemisphere and north in the southern hemisphere.
A tracking mounting system adjusts the angle and orientation of the solar panels according to the movement of the sun, increasing the energy output by up to 25%.
In this blog, we will show you how to install solar panels on the ground using ground mount solar system in four easy steps.
Step 1: Choose the Right Location and Size for Your Ground Mount Solar System
The first step to install solar panels on the ground using ground mount solar system is to choose the right location and size for your ground mount solar system. You need to consider the following factors:
• The size and shape of your land and the amount of sunlight it receives
• The type and size of your solar panels and the amount of electricity they can produce
• The cost and efficiency of your solar panels and the payback period of your investment
• The local zoning and building codes and regulations that may affect the size, height, and placement of your ground mount solar system
You can use online tools, such as ValkPVplanner https://www.solarfeeds.com/mag/ground-mount-solar-system-manufacturers-china/ by Van der Valk Solar Systems https://www.solarfeeds.com/mag/ground-mount-solar-system-manufacturers-china/, to help you calculate the correct dimensions and materials for your ground mount solar system.
Step 2: Prepare the Site and Foundation for Your Ground Mount Solar System
The second step to install solar panels on the ground using ground mount solar system is to prepare the site and foundation for your ground mount solar system.
You need to do the following tasks:
• Clear the site of any debris, vegetation, or obstacles that may interfere with the installation
• Level the site and compact the soil to ensure a stable and even surface
• Mark the location and layout of the base rails and posts using stakes and strings
• Dig holes for the posts according to the manufacturer’s instructions, usually at least 1 meter deep
• Pour concrete into the holes and insert the posts, making sure they are plumb and aligned
• Attach the base rails to the posts using bolts or screws
Alternatively, you can hire a professional contractor to lay a concrete slab or use ground screws instead of concrete foundations for your ground mount solar system.
Step 3: Assemble the Frames and Panels for Your Ground Mount Solar System.
The third step to install solar panels on the ground using ground mount solar system is to assemble the frames and panels for your ground mount solar system.
You need to follow these steps:
• Unpack the components of your ground mount solar system kit and check if they are complete and undamaged
• Lay out the frames on the ground according to the manufacturer’s instructions
• Connect the frames using bolts or screws, making sure they are square and secure
• Lift the frames onto the base rails and attach them using bolts or screws
• Lay out the panels on top of the frames according to the manufacturer’s instructions
• Attach the panels to the frames using clamps or bolts, making sure they are aligned and overlapping
Step 4: Connect Your Ground Mount Solar System to Your Home’s Electrical System
The fourth step to install solar panels on the ground using ground mount solar system is to connect your ground mount solar system to your home’s electrical system.
You need to do these tasks:
• Run conduit from your ground mount solar system to your home’s main service panel
• Install an AC disconnect switch near your home’s main service panel
• Connect the conduit wires to your home’s main service panel through a dedicated circuit breaker
• Install an electric meter near your home’s main service panel
• Connect your ground mount solar system to your utility grid through a net metering program
Alternatively, you can hire a licensed electrician to perform these tasks for you.
Conclusion
Installing solar panels on the ground using ground mount solar system is not a difficult task, but it does require some planning and preparation.
By following these four easy steps, you can install solar panels on the ground using ground mount solar system in no time:
• Choose the right location and size for your ground mount solar system
• Prepare the site and foundation for your ground mount solar system
• Assemble the frames and panels for your ground mount solar system
• Connect your ground mount solar system to your home’s electrical system
A ground mount solar system is a great way to generate clean and renewable energy for your home or business. A ground mount solar system can also save you space, money, environment, enhance aesthetics, and provide convenience. To choose the best ground mount solar system for your needs, you can use some online tools or consult with a professional solar installer.

Pingback: what is the best solar company - Solar mounting system manufacturer